Page load count: # since February 13th, 1999. Project: CB750K2 restoration

Project:
CB750K2 restoration (under construction)

Could'n resist:

Momentum from "Titanic" (74k wav file)
What is this page about
Project status page, holding all releated information about the subject of the project.
You see? I am still smiling!


Why I bought this wreck

    I had just been in hospital for a week or 6, and another 5 weeks in plaster, from my hips to my chin. I had finished my CB350 project (or allmost), and needed something to work on again. I had the original partsmanual for the K,K1 and K2, as well as the K Honda shop manual laying around since the mid 80's. I was allways impressed by the drysump system. This combination made me look for a CB750, preferably an older one. When shopping for parts for the 350, I had already seen that K2 (of which I had no idea that is was a K2), at Wegman motoren at Aalsmeer. It looked very complete and original and not to hard to restore. It even had the original exhaust. Chris Wegman told me it had been sitting for around ten years then (april '97), and before that he had driven it from his previous to his current location. After some discussion at home, I decided to buy the bike, that was for Hfl 1750,=. I managed to get two good fork front covers (also known as fork ears- which tend to rust through) with the bike. I took a day of (april 25th, 1997), hired a trailer and went to Aalsmeer. He already had the bike outside, and one of his people was scrubbing all chome parts with a wire brush. First I did was to tell him to stop that immediately. He looked at me as if to say:" I am only helping you?". Because the bike had it's last run in around '87, and this was a short run, the amount of water build up in the cylinders had frozen the engine. Yet another challenge. I tied the bike up on the trailer, and went home.

At Wegman Aalsmeer, Netherlands

Work on the engine

  • Disassembling
    Comment to come in near future. Stuck pistons. Stuck piston rings.
  • Cleaning the engine
    Degrease and beadblast, comment to come in near future
  • Engine top: camshaft and head
    Comment to come in near future
  • Engine cases: inside like condition of crankahft bearings, gearbox.
    Comment to come in near future
  • Starter motor
    Comment to come in near future.
  • Engine Paint
    Before having the engine cases bead blasted, I had to find a paint-code, that matched the cases as close as possible. I found one spot at the rear of the upper case, that had been covered with chain grease the most of it's existance, and the paint was still on. I went to the local car-paint shop, we compared it and I bought 500cc of Sikkens code -will have to look that up-. The paint I ordered and used was a two component car paint, that goes on car parts normally, like doors and fenders. I spray painted these parts in april 1998. (I have done around 2000 kms with the bike up to now, and it is still looking great). That means that the laquer is resistant against the temp of the engine, which can go up to 100 C. The Cylinder block and head would have to get a layer that would be more heat resistant. I took a special alum colour spray can for this.
    NOTE: A heat resistant spray is usually not fuel-resistant, and not a good paint for the engine cases to use: any fuel leak in the carbs (which you will have), will destroy your hard work immediately!
  • Assembling
    Comment to come in near future, new parts, incl gaskets!
  • Engine side covers and valve cover
    Comment to come in near future
  • Points and plugs
    Comment to come in near future

Unrestored engine Partly restored engine

Carburettors


Work on the frame

  • The Initiative
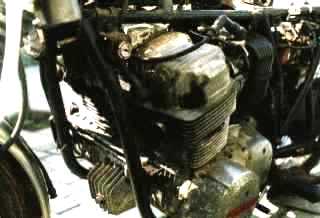
    Allmost as soon as I had the engine taken apart, and I realized that it would take a lot of money to do a complete rebuild (at least much more that I 
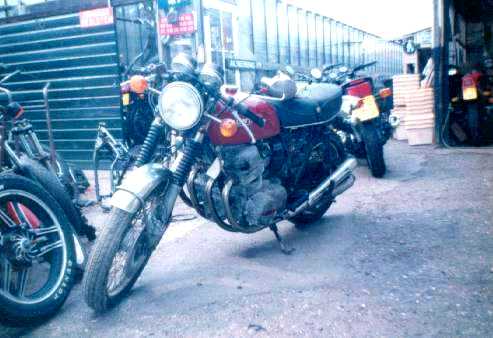
had in mind), I stood in my garage looking at the rest of the poor bike. I already knew 
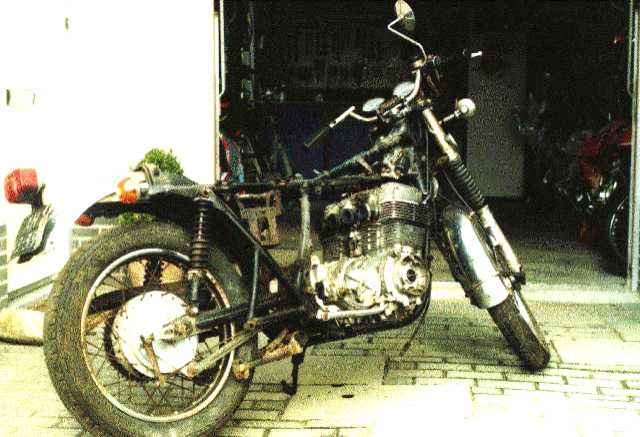
that the frame had to be repainted. There were spots of rust everywhere. You could say that there was more rust that paint on the surface. Keeping in mind that I could do the painting myself, I decided to strip the frame completely. Imagine: One engine in pieces on the shelves, and next all wheels, elecrics, cables, bobines, tank added to that.
  • Painting
    When I told someone I know well what my plans with the frame were (which was sandblasting and spraypainting), he told me that he would take it to his Opel garage (where he workes) and do it "professional". And so he did. This was december 21st, 1997: my mothers 65th burthday party. I knew that I should not be in a hurry, since it probably would cost me nothing. It took him around 6 weeks, and when I got it back I was amazed that it could look this way. Wow!. I brought him a bottle of Graan Jenever and a shopping voucher.
  • Steering stem bearings
    I replaced the steering stem bearings with tapered roller ones, since I had broken the old lower-upper race hitting it from the frame. A kit from the Honda dealer cost me around Hfl 100,=. This included two bearings, and a shim that operates as a distancer. The sizes mentioned on the box are: H264815 and H305014. Box saiz "All CB/GL/CL/SL/CX/CM street models (200 thru 1000cc). Brand Parts+Plus, kit SSH750.
  • Rear shocks
    The shocks on the 750 were Koni's. The condition was rusted, all paint was off. I hung the springs in battery acid for a few days, and sandblasted them. I also cleaned all other shock parts with a rotary brush. After this was done, I used my home-made-sandblasting-box to clean them from the last rust and dirt. Then spray-painted them, Mostly black, but also some silver paint. Allthough I exchanged some messages with a lister of Sweden, I did not change the oil in the shocks. It is possible, though. A while later I found a set of nice condition chrome shocks, that had a label on them saying "CB550". The length and the fit was OK. But arriving home, I found that, when fitted, they were in the way of the chain case. Left them on for a few months, until I found a set at Siccema's shop in Roodeschool, that I got for Hfl 30,=. They looked beautifull, but were mechanically bad. I still have them on the bike.
  • Front forks
    Comment to come in near future. TOP TRIPLE CLAMP
  • Wheels/tyres
    I have put on new tyres on the bike, and a set of new rims available. I bought these rims from Axel Griessmann. I still have to respoke the wheels, using Axels rims. Installed new rear and front bearrings, non Honda (much cheaper).
  • Chrome parts
    What 'XW' parts are on this 750? Front fender, rear fender, engine covers, forks, rims, rear shocks, steering bar, and thousands of other small parts. i have found that, as long as they are available, you should buy them new if bad. I was able to find some nice parts: front fender and forks. rear fender is still high on my whish list, since it is rusted through on the top.
  • Seat
    The seat was torn, the pan was rusty, but the foam was just OK. So I removed the skin, and undid all the dirt from the pan. Painted it using a high gloss two component laquer. I had done tears in the skin before: using black silicone kit and some same material as the skin is made of, it is repairable. stick the materrials back to back and press tem toghether with some pieces of wood. I found the result on my CB360 great, but my 750 has turned out 'acceptable'. May have to find a NOS seat some day. Also still looking for the strap: the belt is gone and the triples are rusted.
  • Exhaust
    Comment to come in near future.
  • Brakes
    Comment to come in near future.
  • Handle bar, grips and switch assy's
    Comment to come in near future.
  • Speedo and tacho assy's
    Comment to come in near future.
  • Stands and steps
    Comment to come in near future.
  • Toolkit
    Comment to come in near future.
  • Elctrics
    Comment to come in near future.
  • Final drive chain +case and sprockets
    Comment to come in near future

Freeze frame Another frame shot

How I made the bike original


Firstrun

    This was the exciting day! 4th of july 1998. Believe it or not. I quickly put on the coils, the carbs, the gas tank without fastening them. Pre adjusted the points. Added some fuel, and, again believe it or not at the third kick the 750 came alive again after 14 years. Coincidently the National Hymn was on TV, because of the world socker games. The first ride was very exciting. It had been a long time since I had been driven a bigger bike that the 350, and it also was a long time ago since the bike had run. Would it hold up? How would the steering be? Would it use oil? The first thing I discoverd was that I needed to replace the old front tyre. The rubber was to hardened. After replacement (I found a cheap Bridgestone -Hlf100-), that was OK.

Unrestored engine

The painted parts

    I had been looking at my gastank for some time, not knowing exactly what to do with it. The visible colour was some dark-purple/red (one colour), One huge dent on the left front side, and some small holes behind the left badge. I started scratching off the paint layer and found the famous K6-blue colour. Probably a PO had the K6 look in mind for his K2. Going through that layer very carefully, I found the Gold layer. I tried to restore this original layer, and worked on it for many hours, but after all it was not feasable to do this for the whole tank. I decided to strip it completely. I filled the dents with a huge amount of tin. The, on November 11th, 1998 Johan Spaan visited me. He came all the way from Purmerend on his mint, never restored K2. When I sam this bike, I thought that I would never be able to spray paint my old dented gastank and cracked side covers. At least not in that amazing "Candy Gold Custom". Again, with some strubbles in the family, I called David Silver Spares and ordered these parts NOS. That cost me around Hfl 1200, but when they arrived the next week I had forgotten the price immediately.

Maiden trip


    Other experiences

      Good jobs
      What went well:
    • Clean the engine very well from sand before assembling.
    • I found that relplacing the oil after the first 400 kms or so was worth while. There was some sand in the filter housing from the beadblasting. After that I have still found rests of the sand on non critical parts of the engine.

      Mistakes
      Unfortunately, like anyone else, I make mistakes.
    • The mistake with the biggest impact I made was when disassembling the crackcases: I was to rough on it, because these cases come apart very hard. I broke a small piece of the aluminium when hitting it with a soft hammer. Luckyly it is at a non-visible spot.
    • I had the same when removing the cylinder block, one small piece of the lower fins broke.
    • Another: removing the valves from their guides, two of them went out a little hard. I pressed them out. This was wrong, then the top of the stem was widened, and it scraped some of the guide metal.

    Owner Rene van Maanen Creation Date February 11th, 1999